Thursday, 30 October 2014

Skellig


Positive and Negative Space

 
When my year 5 and 6 classes were reading the book Skellig by David Almond we looked at the concept of positive and negative space. I used the artist tool kit (as found in my useful website list on the right) to introduce the concept. We then made our own possible figures with wings using split pins. The children lay their figures on to black sugar paper in the position of their choice.


We then used white paint to splatter around the figure. Ensuring that it didn't move and concentrated the splats around the figure. When the children removed their figure a negative space was left.
 
We then moved on to using our Skellig figures to create a textured picture using masking tape.
The children posed their Skellig figure on another pieces of black sugar paper and drew round it.
 
They then filled the shape with torn pieces of masking tape. They children soon found out that the size, thickness and the direction of the tape changed the texture of the picture.


Cool and Warm Colours


Seascapes


When wanting to introduce the children to the vocabulary of cool and warm colours I used the seascapes to help them divide their paper.
 
We used oil pastels to create seascapes with a warm colour section and a cool colour section. The children used warm for the sun and cool for the water. They used wavy lines for the sea alternating colours then used curved lines for the sun in warm colours.
The results for 7 and 8 year olds were stunning.

Puffy Paint


Earth Day - Environment Art Projects

 
Experimenting with mixing paints with other materials is a great sensory process for children to experience. Last term my year 1 and 2 classes were covering environment and saving the world by recycling.
 
We combined the topic and the skill by making puffy paint worlds.


I gave the children a blue piece of sugar paper with a large circle drawn on it. We used green paint and shaving foam mixed together gentle to apply as the land masses of the world. When left to dry the paint hardens. This process generated much discussion about what other materials we could mix paint with.


Revolting Romans

My year 3 and 4 classes this term have had the topic of Romans to study. This gave us the opportunity to do a lot of 3D work. This term is the first time the year 3 class has had art with me as part of the PPA rota.


Roman Soldiers

We began the term looking at the Roman soldier and his armour. we played the dress the Roman Soldier game in the IWB to introduce the different parts of the Roman soldier equipment. We then used toilet rolls and gold paper to create our own models.
 
 
The children painted the toilet roll half red (for the tunic) and half pink (for his face). we then used egg cartons and gold paint for the helmets and added gold paper to the toilet rolls for the different parts of the soldier's armour.


 Finally the children added a plume to the helmet using red paper and a face using a black felt tips pen.
 
 
The other project we worked on was the Roman sandal. We used a template that we cut out accurately - which was a skill we needed to practise. Then using a single hole punch to create hole to thread the laces. I was then surprised by how the children struggled to thread the ribbon or string for the laces. It made me aware we needed to do some more textile work.
 

Trojan Horse

 
The Battle of Troy


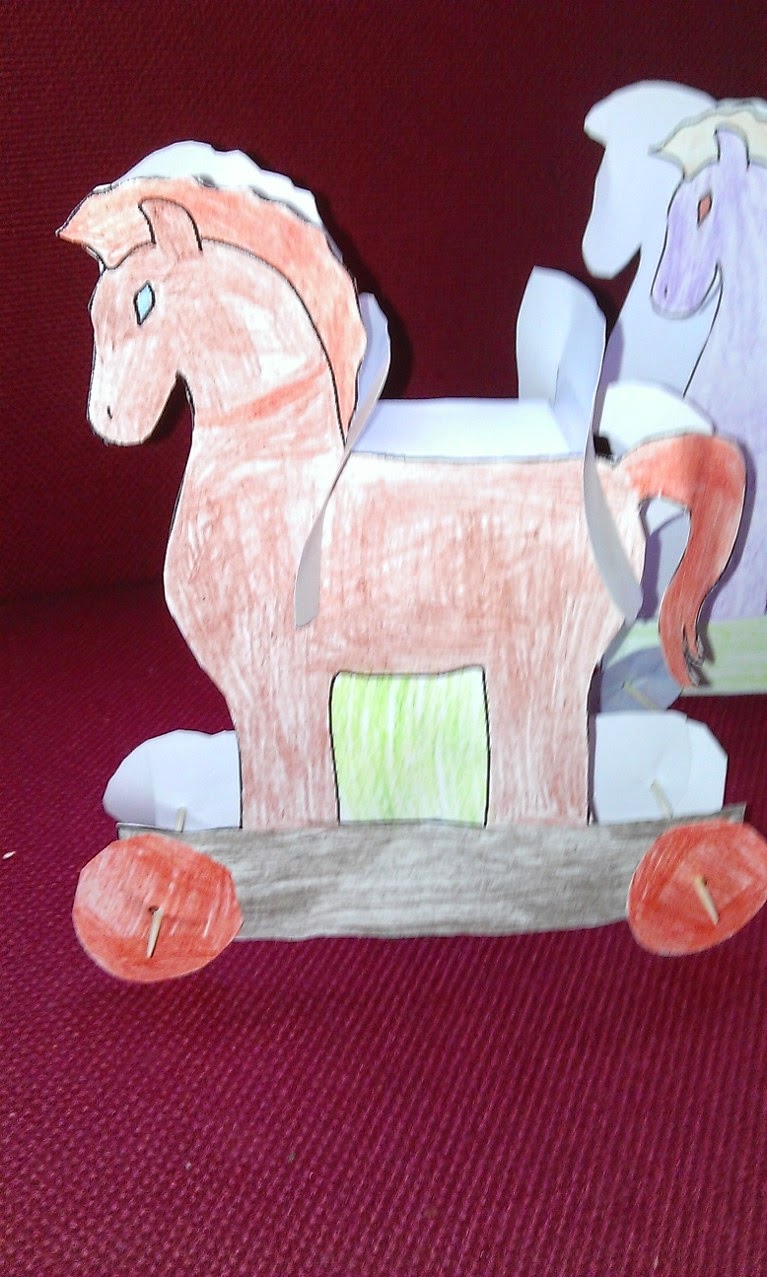
The stories of the battle of troy really appealed to my year 5 and 6 classes this term so I decided to have an end of term large project both classes would work on together. My daughter's secondary school had created a wooden replica of the Trojan horse; I felt a similar project would be exciting for us to end the term on.

unfortunately my budget and expertise would not stretch to making a wooden horse but cardboard was an easy alternative. I drew the template but the children cut and painted it in groups across two weeks. They also painted wheels that have just been added. I do not have a final finished picture at the moment but I will add one later.


We split the class into those working on the horse and those who could make their own individual models out of card. We also had some making models of different ancient Greek mythical characters. Click here for the templates.


Once the horse was dry we used empty copier paper boxes to secure the two sides. Using a glue gun the boxes gave it strength and width. These were then painted and the wheels were added again using a glue gun (my latest new toy).
In total our horse in six feet tall. when drawing the large scale model, I took the template for the individual Trojan horse and times all the dimensions by 10. This project was great for the children to work collaboratively on a large scale.


Greek Pottery

Ancient Greek Pottery


Carrying on from the Greek architecture, the children began work on their own Greek pottery. We began with looking at the importance of the pottery and how each one told a story or represented different myths. The children were shown a video explaining how the pottery was made. We are not lucky enough to have a kiln in school so we used air drying clay so I felt it was important to know the process for the Greeks was different. We then looked at form and how to use them in 3D work to get the shapes we desired. each child used a balloon to get their sphere shape and added cardboard cylinders to the top and bottom. Some added extra shapes for handles.
 
 
We then took the next lesson to cover it completely in papier mache. Getting the children to mix their own recipe following the instructions and ingredients was a great opportunity for them to practise their measuring skills, giving your lesson an added curriculum link to maths.
It was in the next lesson that I really pushed them to think about positive and negative space. they had to decide whether they would paint in the positive or negative. the children covered their vases in a layer of orange paint. and made sketches in their books as to what story of Odysseus's' they wanted to depict on their vases while they dried.
 
 
After they were dry the children set about painting with thin brushes. Most chose to paint in the positive with and orange background and black figures. Some did attempt the negative where they filled the space around their figures with black leaving their design orange.
 
 
We had some interesting depictions, including the Cyclops and the battle of Troy to the witch Circe turning Odysseus's men into pigs.


Ancient Greeks

This Term my year 5 and 6 classes have been investigating Ancient Greece. Their literacy text has been the tales of Odysseus. I have had great fun this term and really wanted to share this outcomes of this terms art.


Ancient Greek Architecture

 
We began the term looking at Ancient Greek architecture and how it has had an impact on architecture today. We looked at the different columns and what they represent. the children then set about making their own Greek column
 
we used PVA glue to secure art straws to a piece of plain A4 paper. Whether the paper is landscape or portrait determines the height of the column. The children experimented with different size straws and the spacing between them. Once they had covered their pieces of paper we created cylinders by stapling them.
 
The children then added a square of white painted card board to the top and bottom. The children then had the option to add decoration to the column to create one of the three designs we had looked at.
As a plenary we looked at a power point of Greek architecture around the world and identified which style of column had been used.


Art Room Assessment Strategies


Top 5 Assessment Strategies for the Art Room

1) Target Rulers - My younger classes love this. As a school the children generally have a target for both maths and literacy which they know and have stuck in the back of their books. When I introduced this strategy the children really took to it like ducks to water. Again I got the rulers from a website. Each ruler has a list of focuses for the children to work on. i.e cutting, gluing and pencil control etc. I just circle the focus most appropriate for the individual child. Each ruler in then stuck in the back of their sketchbooks which they have out most lessons. The children can ticket the focus if they feel they have met the target and you can sign it off when they move on to the next focus. click here for the target rulers.

2) Show and Tell - I use a USB web cam to link to the IWB and show children's work at various points during the lesson. The children whose work it is then have to justify how it meets the success criteria for that lesson. The children love being chosen to have their work shown on the interactive whiteboard and the rest of the class show thumbs up or down if they feel it meets the success criteria. This is a great way to remind the children to use the success criteria as they work not just as a tick list at the end. It also gives those who may of left something out of their work time to make any changes they need.

3) Peer Assessment Burger - This is a new strategy for me. I have seen it used in literacy lessons and thought I would adapt it for art. I was luck enough to find a template already click here. This works great for plenaries and early finishers. Children need to be in pairs and swap work. each child fill out the burger with two what went well or what I like comments as the bread. The meat of the sandwich is one comment or sentence about what could be improved.

4) Exit Tickets - Again not a new concept can be used in all subjects. Each child fills out an exit ticket about what they have learnt in the lesson today. This is great for you as the teacher as they can be looked over at a later date and inform planning. The children holds onto their ticket as the line up and as they walk out the door they stick their ticket to the board by the door. My most favourite comment to date is 'If I shut up and get on with it I get more work done' . For copies of the exit tickets click here.

5) Learning Walk - This can be done at any point in the lesson but I tend to use it at the end as a whole class assessment process. Each child after clearing up puts their work on their table. The class stands behind their seats and then has two minutes to walk around looking at others work. When the time is up they have to pick somebodies work to stand behind. No more than one person per piece of work. This means everyone gets an advocate for their work. Pick children at random to say why they chose this particular piece of work and assess it against the success criteria.


Sunday, 5 October 2014

Charcoal Robots


Using Tone and Value

 
Most children generally get the concept of light and shade from early in KS1 or even earlier but getting the children to include it in their art work in the correct way can be tricky. Whilst studying the Ted Hughes book The Iron Man I though it was a perfect opportunity to teach using value in a picture. I wanted the children to create an Iron Man portrait so though using the medium of charcoal was the best way. The children would be able to blend the charcoal which would help seeing the value scale.
 
 
I began with a medium value charcoal and blocked in the shapes then asked the children to do the same. I was more than pleased when I didn't see 30 picture the same as mine. They had really experimented with the shapes to create different faces.


I then spoke about light sources and how the places where the light hits is the brightest getting darker as they light was blocked. We discussed which areas we would shade and which would be highlighted. They were then given a free reign to colour the eyes and background. I must admit this particular class amaze me when they use soft pastels and charcoal, the results were outstanding for their ages.

Ted Hughes - Iron Man - Robots


Designing Robots
 
Ted Hughes book the Iron Man gave me the perfect opportunity to introduce the children to the process of design. We gave the first two sessions out of the four purely to the initial Define, collect, brainstorm and develop stages.
 
 
As a class we brainstormed and collected ideas for what type of problems we could use a robot for solving. Using their sketchbooks the children designed at least 4 different robots using a range of shapes and sizes. In the second session they had to choose one to develop further. Redrawing their design on a larger A3 scale. This was a great opportunity for them to change anything they didn't like or add ideas they had collected from looking at others work over the last week.
 

Our third and forth sessions concentrated on selecting junk materials with the correct forms to create a model of their robot. After the first session I took the decision to buy large amounts of aluminium foil and silver tape. They covered a multiple of sins giving an over all metal look. Trying to paint a wide range of plastic and cardboard junk was not practical.


Thankfully, we have a Scrap Store locally and one trolley full of bottle tops, jar lids and plastic button were more than enough for the children to use for finishing touches. The range of shaped and sized models the children created were fantastic. The purpose for each robot also varied from chicken cooking robots to homework doing robots. My favourite has to be the boyfriend robot dressed in tuxedo.
 
After the process I encouraged a verbal discussion on the final two stages of the design process feedback and improve. What would they of done differently? As they built their robots what changes did they make and why? This really helped them understand the design process as a continual cycle.


Life Size Sarcophagus


Sarcophagus Decorations and Pharaoh Faces
 
Another ancient Egyptian project that linked well with the class historical topic. Year 5 and 6 had visited the British Museum in London and collected sketches of Egyptian sarcophagi and the decorations the Egyptians had painted. I then came up with the idea for a two part project.
 
First the children used A1 sugar paper taped together and in pairs drew a life size sarcophagus shape. They then used metallic paint to create backgrounds and paint hieroglyphs they took sketches of at the museum. This was an opportunity for the children to paint hidden messages using the Egyptian hieroglyphs. 


For the second part the children use oil pastels and water colours to create an Egyptian pharaoh portrait. I used the video for the children to draw along with on the IWB so they could all see each step, rather than myself modelling each step with some children needing it repeated.
 
once finished, the children chose which of the pairs portraits would be cut out and stuck on the sarcophagus. Those left over were displayed along side in a pharaoh portrait gallery.

Mummies and their Pyramids


Ancient Egyptian Pyramids


Using mathematic nets to create these Ancient Egyptian Pyramids with individual mummies provide great opportunities for the children to use their mathematical knowledge of shape. We began by drawing a square based pyramid net on cardboard. This was done with a year 5 and 6 class so they already knew about the properties of shapes and the angels in an equilateral triangle. Most of the children could use this in their work. The cardboard I used was thick and their was a need for sharp scissors and adult support.
 
In the second session the children then created decorations for the inside using Egyptian hieroglyphs and painted the outside with a yellow base and drew brick patterns with pencils and felt tips. You could use tabs in the net to secure the sides together but I went for simple hole punch in the top tied with a pieces of string as the children were drawing their own nets.
During our third session the children created their mummies for the inside. I have seen this done with salt dough but I wanted to include as many maths opportunities as possible so went for the tin foil and masking tape. The children were given a couple of sheets of tin or aluminium foil. I modelled using the foil to create different 3D forms - which once put together would form their mummies. then with the second sheet of foil they wrapped in around to make the sarcophagus shape. Finally to give the mummy an authentic look we tore small strips of masking tape and wrapped it around the mummy as bandages.